
Do you intend to create a website? Making your first website might be daunting, especially if you’re not tech-savvy. You’re not alone, so don’t worry.
In today’s digital age, having a website is essential for any business or individual looking to establish a strong online presence. WordPress is one of the most popular content management systems (CMS) for building websites. In this article, we will discuss the step-by-step process of creating a WordPress website in 2023.
We have made the most thorough step-by-step tutorial on how to establish a WordPress website without knowing how to code after assisting more than 400,000 individuals in doing so.
All ages and ability levels of users will benefit from this manual. But, you can get free setup assistance from our professional team if you need it.
Please continue to follow our user-friendly instructions for creating a website if you wish to do it yourself.
Below is a summary of every step we’ll take you through in this course, from beginning to end.
Table of Contents
Step 1: Choose a Domain Name and Web Hosting
The first step to creating a WordPress website is to choose a domain name and web hosting. A domain name is your website’s address on the internet, while web hosting is where your website files are stored.
Making the incorrect website platform selection is one of the most frequent errors made by novices. Fortunately, you are here, so you won’t commit that error.
A self-hosted WordPress.org site is the ideal solution for the majority of users. You can build any kind of website you can imagine using its countless addons and designs. Please visit our article on why you should use WordPress for more information on this subject.
WordPress is available for download and use by anyone, without any limitations, to create any type of website.
Where does the money come from if WordPress is free?
WordPress is free since you’ll need to secure your own unique domain name and web hosting company, both of which are expensive arrangements. See our article Why is WordPress Free? for more information on this subject.
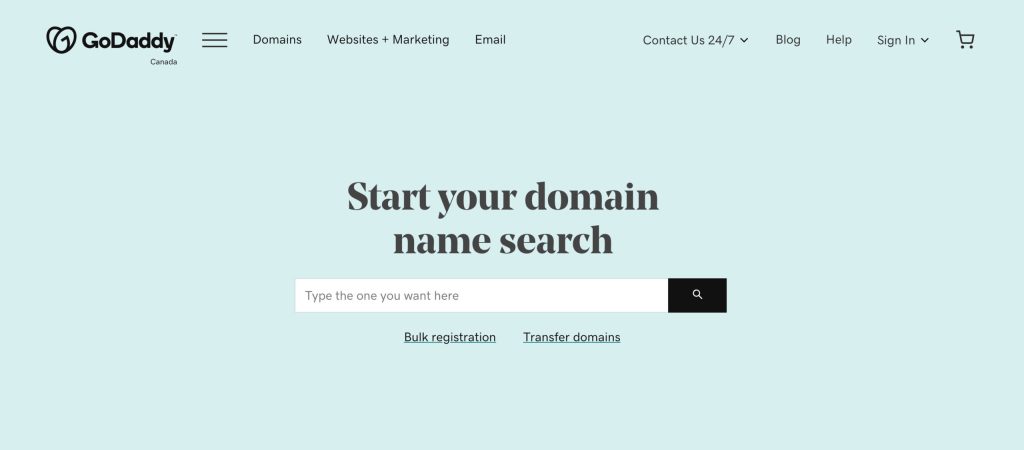
The internet address of your website is its domain name. Your users will enter this to access your website in their browsers (For example, techyk.org, wpbeginner.com or google.com).
You’ll also require website hosting. To keep their website files, all websites on the internet require a web host. This will serve as the online home of your website.
Typically, a domain name costs $14.99 per year, and monthly hosting fees start at $7.99.
For the majority of people who are just starting out, this is A LOT.
There are several domain name registrars and web hosting companies to choose from, such as Bluehost, HostGator, and SiteGround. Consider factors such as pricing, features, and customer support when selecting a provider.
>> Get a .COM Domain name for Just $6.98 for A YEAR
Step 2: Install WordPress
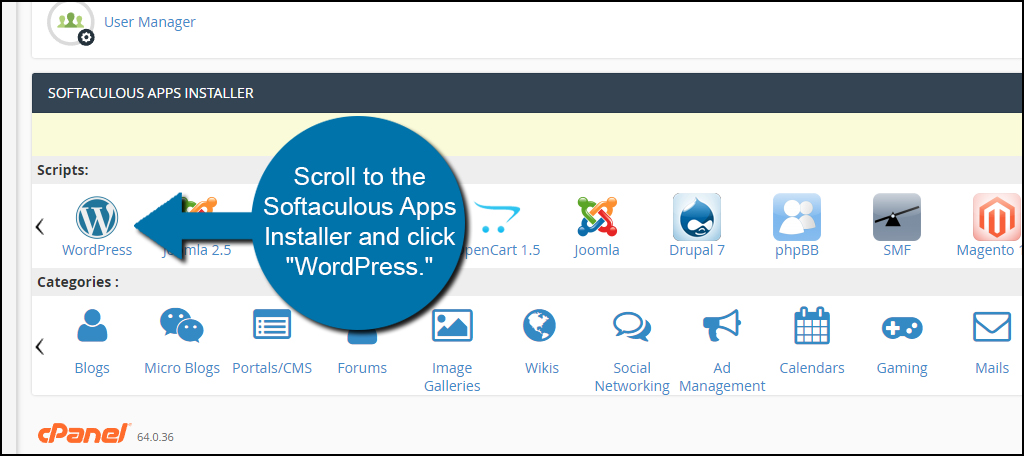
Once you have chosen a domain name and web hosting, you can install WordPress. Many web hosting providers offer one-click WordPress installation, which simplifies the process. Alternatively, you can download WordPress from the official website and install it manually.
WordPress is one of the most popular content management systems (CMS) for building websites. With its user-friendly interface and extensive customization options, WordPress has become the go-to choice for individuals and businesses looking to establish a strong online presence. In this article, we will focus on how to install WordPress, the essential first step in creating a WordPress website.
Step 1: Choose a Web Hosting Provider
Before installing WordPress, you need to choose a web hosting provider that meets your needs. Web hosting is where your website’s files will be stored and made available on the internet. There are many web hosting providers to choose from, such as Bluehost, HostGator, and SiteGround. Factors to consider when choosing a web hosting provider include price, uptime guarantee, server location, and customer support.
Step 2: Register a Domain Name
After choosing a web hosting provider, the next step is to register a domain name. A domain name is your website’s address on the internet, and it typically consists of a name and a top-level domain (TLD), such as .com, .org, or .net. Some web hosting providers offer a free domain name when you sign up for their services. Alternatively, you can register a domain name separately from a domain registrar, such as Namecheap or GoDaddy.
Step 3: Create a MySQL Database
WordPress stores your website’s content in a MySQL database, so the next step is to create one. Most web hosting providers offer a cPanel interface where you can create a MySQL database. Log in to your cPanel, navigate to the “Databases” section, and select “MySQL Databases.” Create a new database by entering a name and clicking “Create Database.” Remember to note down the database name, username, and password, as you will need these later during the WordPress installation process.
Step 4: Download and Install WordPress
WordPress can be downloaded from the official WordPress website. Download the latest version of WordPress and extract the files to a folder on your computer. Using an FTP client, such as FileZilla, upload the WordPress files to your web hosting account. You can upload the files to the root directory of your domain, or to a subdirectory if you want to install WordPress in a subdirectory of your website.
Step 5: Configure WordPress
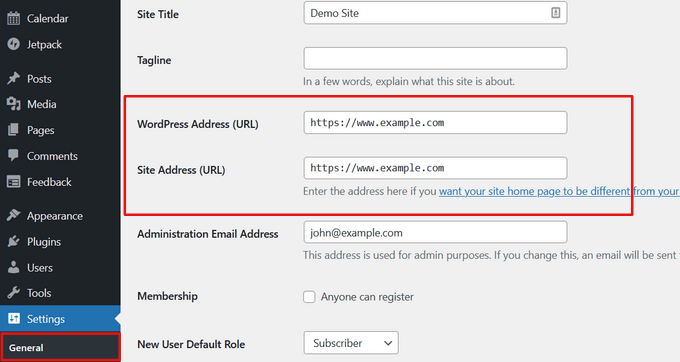
Once the WordPress files have been uploaded to your web hosting account, you can configure WordPress by navigating to your website’s URL. You should see a screen asking you to select a language. Choose your preferred language, and then click “Continue.”
Next, you will see the WordPress installation screen. Enter the database name, username, and password you noted down in Step 3. Leave the database host as “localhost” and the table prefix as “wp_.” Click “Submit” to continue.
WordPress will now check if it can connect to the database. If the connection is successful, you will see a screen asking you to enter your website’s title, username, password, and email address. Choose a strong username and password, as this will be your login credentials for accessing the WordPress dashboard. Click “Install WordPress” to complete the installation.
Step 6: Log in to the WordPress Dashboard
After the installation is complete, you can log in to the WordPress dashboard to start customizing your website. To log in, navigate to your website’s URL followed by “/wp-admin,” such as “https://yourdomain.com/wp-admin.” Enter your username and password, and then click “Log In.” You will now see the WordPress dashboard, where you can manage your website’s content, themes, and plugins.
Installing WordPress is a straightforward process that requires some basic technical knowledge. By following these steps, you can install WordPress and begin building your website in no time. Remember
Step 3: Choose a Theme
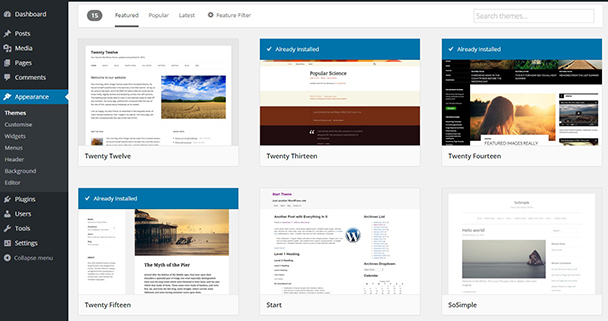
A WordPress theme determines your website’s design and layout. There are thousands of free and paid themes available, and you can browse them directly from the WordPress dashboard. Choose a theme that aligns with your brand and business goals.
When it comes to creating a WordPress website, one of the most important decisions you will make is choosing a theme. A theme determines the look and feel of your website, including its layout, color scheme, and typography. In this article, we will explore the process of choosing a theme for your WordPress website.
Step 1: Identify Your Needs
The first step in choosing a theme is to identify your website’s needs and goals. Consider the purpose of your website, your target audience, and the type of content you will be publishing. Do you want a simple and clean design, or a more visually appealing layout with lots of images and graphics? Are you creating a blog, an e-commerce site, or a portfolio?
Answering these questions will help you determine the type of theme that is best suited for your needs. For example, if you are creating an e-commerce site, you will want a theme that is optimized for online sales and includes features such as product galleries and shopping cart functionality.
Step 2: Research Theme Options
Once you have identified your needs, the next step is to research theme options. WordPress offers thousands of free and paid themes, so it can be overwhelming to choose the right one. Start by browsing the WordPress theme directory or third-party theme marketplaces such as ThemeForest.
When evaluating themes, consider factors such as design, functionality, support, and reviews. Look for themes that have a professional design and include the features you need. Check if the theme is regularly updated and has good customer support. Finally, read reviews from other users to get a sense of the theme’s strengths and weaknesses.
Step 3: Preview and Test Themes
After narrowing down your options, the next step is to preview and test themes. Most WordPress themes allow you to preview their design and layout before installing them. Use the preview feature to get a sense of how the theme will look and feel on your website.
If possible, also test the theme on a staging site or local environment before installing it on your live website. This will allow you to see how the theme works in practice and make any necessary adjustments before going live.
Step 4: Customize Your Theme
Once you have chosen and installed your theme, the next step is to customize it to fit your needs. Most WordPress themes offer customization options such as color schemes, font choices, and widget areas. Use these options to make your website look and feel unique.
You can also customize your theme using plugins such as Elementor or Beaver Builder. These plugins allow you to create custom layouts and designs without needing to know how to code.
Step 5: Keep Your Theme Up to Date
Finally, remember to keep your theme up to date. Regularly updating your theme ensures that it remains compatible with the latest version of WordPress and any plugins you are using. Updates also fix bugs and security issues, ensuring that your website remains stable and secure.
Step 4: Install Plugins
Plugins add functionality to your WordPress website. There are thousands of free and paid plugins available, and you can browse them directly from the WordPress dashboard. Essential plugins to install include a security plugin, a backup plugin, and an SEO plugin.
Plugins are a critical component of any WordPress website, allowing you to add functionality and features beyond the core WordPress software. In this article, we will explore how to install plugins on your WordPress website.
Step 1: Identify the Plugins You Need
Before installing plugins, it’s important to identify the ones you need. Consider the purpose of your website, the type of content you will be publishing, and the features you need to achieve your goals. Some common types of plugins include SEO plugins, security plugins, backup plugins, caching plugins, and social media plugins.
Once you have identified the plugins you need, search for them in the WordPress plugin directory or third-party marketplaces such as CodeCanyon. Look for plugins that are highly rated, regularly updated, and compatible with the version of WordPress you are using.
Step 2: Install Plugins from the WordPress website Plugin Directory
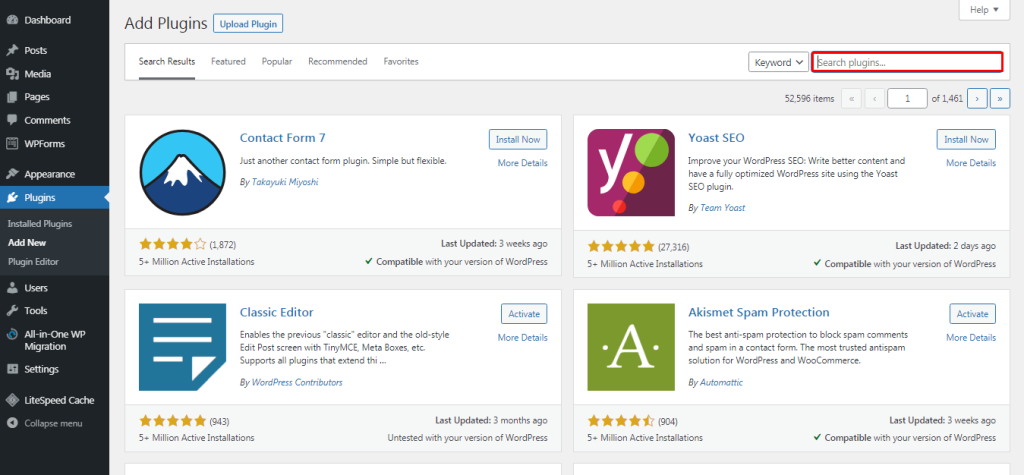
Installing plugins from the WordPress plugin directory is straightforward. From your WordPress dashboard, go to “Plugins” and click on “Add New.” From here, you can search for the plugin you want to install by keyword or browse popular plugins.
When you find the plugin you want to install, click on the “Install Now” button. WordPress will automatically download and install the plugin. Once the installation is complete, click on the “Activate” button to activate the plugin.
Step 3: Install Plugins from Third-Party Sources
Installing plugins from third-party sources such as CodeCanyon is a little more complicated. First, download the plugin’s zip file to your computer. Next, go to your WordPress dashboard and click on “Plugins” and then “Add New.” From here, click on the “Upload Plugin” button and select the zip file you downloaded.
WordPress will upload and install the plugin. Once the installation is complete, click on the “Activate” button to activate the plugin.
Step 4: Configure and Customize Plugins
Once you have installed and activated your plugins, the next step is to configure and customize them. Most plugins have settings and options that allow you to customize their behavior and appearance. From your WordPress dashboard, go to “Plugins” and then click on the plugin you want to configure.
From here, you can adjust the plugin’s settings and options to suit your needs. For example, you can configure an SEO plugin to optimize your content for search engines or a caching plugin to speed up your website.
Step 5: Update Your Plugins
Finally, it’s important to keep your plugins up to date. Regularly updating your plugins ensures that they remain compatible with the latest version of WordPress and any other plugins you are using. Updates also fix bugs and security issues, ensuring that your website remains stable and secure.
Step 5: Customize Your Website

After installing a theme and plugins, you can customize your website’s appearance and functionality. Use the WordPress customizer to make changes to your website’s layout, colors, fonts, and widgets. You can also add pages, blog posts, and media files to your website.
Custom content is an essential part of customizing your WordPress website. Content includes pages, posts, and media such as images and videos. By creating custom content that reflects your brand and communicates your message, you can differentiate your website from others and establish a strong online presence.
To create custom content, go to your WordPress website dashboard and click on “Pages” or “Posts.” From here, you can create new pages or posts and add text, images, videos, and other elements.
Step 6: Optimize Your WordPress Website for Search Engines
Search engine optimization (SEO) is essential for improving your website’s visibility and ranking on search engines. Install an SEO plugin such as Yoast SEO or All in One SEO Pack, and optimize your website’s meta descriptions, title tags, and content for targeted keywords.
Finally, optimizing your WordPress website for search engines is an important part of customization. Search engine optimization (SEO) involves optimizing your website’s content, structure, and metadata to rank higher in search engine results pages (SERPs).
To optimize your website for search engines, consider using an SEO plugin such as Yoast SEO or All in One SEO Pack. These plugins provide tools and guidance for optimizing your content and metadata for specific keywords and phrases.
Step 7: Launch Your WordPress Website
>> GET 51% off 1st yr Shared Hosting
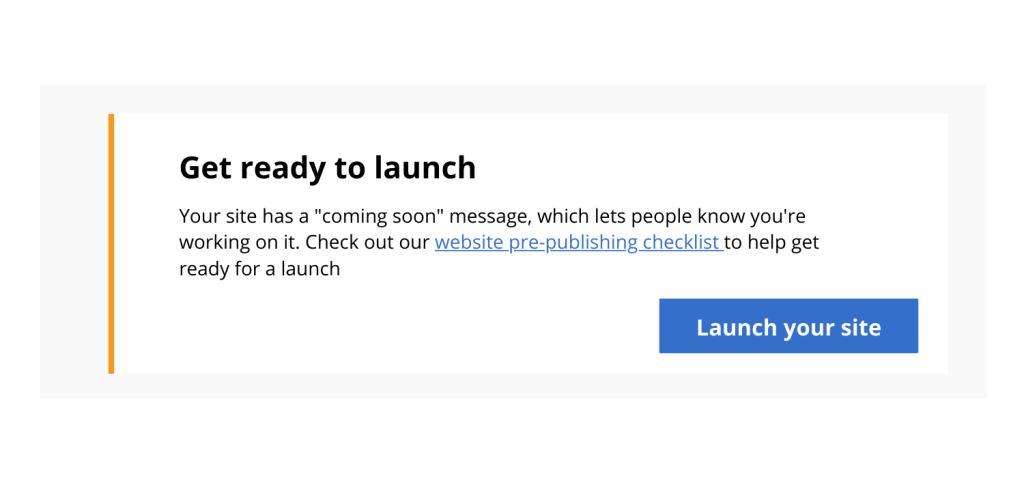
Once you have customized and optimized your website, it’s time to launch it. Double-check that everything is working correctly, including links, forms, and images. You can then make your website live by removing any password protection or “coming soon” pages.
In conclusion, creating a WordPress website in 2023 is easier than ever, thanks to the vast array of tools, resources, and tutorials available. By following the steps outlined in this ultimate guide, you can create a professional and visually appealing website that reflects your brand and meets your goals and ensure optimal performance and security..
However, simply creating a website is not enough. To ensure your WordPress website is successful, you must also optimize it for search engines. This involves choosing the right keywords, creating high-quality content, and ensuring your website is technically sound.
By incorporating search engine optimization (SEO) into your WordPress website design and content creation process, you can improve your website’s visibility and attract more visitors. With time, effort, and dedication, you can turn your WordPress website into a powerful marketing tool that drives traffic, generates leads, and builds your online brand.


Pingback: Cost of a Website in 2023: How Much Should You Expect to Pay? - TechyK
Can you be more specific about the content of your article? After reading it, I still have some doubts. Hope you can help me.
I may need your help. I tried many ways but couldn’t solve it, but after reading your article, I think you have a way to help me. I’m looking forward for your reply. Thanks.
Reading your article has greatly helped me, and I agree with you. But I still have some questions. Can you help me? I will pay attention to your answer. thank you.
Your article gave me a lot of inspiration, I hope you can explain your point of view in more detail, because I have some doubts, thank you.